
For many people, Gmail is the everyday and most convenient way to read emails and communicate. Companies, however, often need name@domain addresses, which are usually not Gmail accounts. So how can you read the email arriving at a domain address in Gmail? The simple way is to forward those emails to your Gmail address.
How do you forward emails to Gmail? Let us go through it step by step.
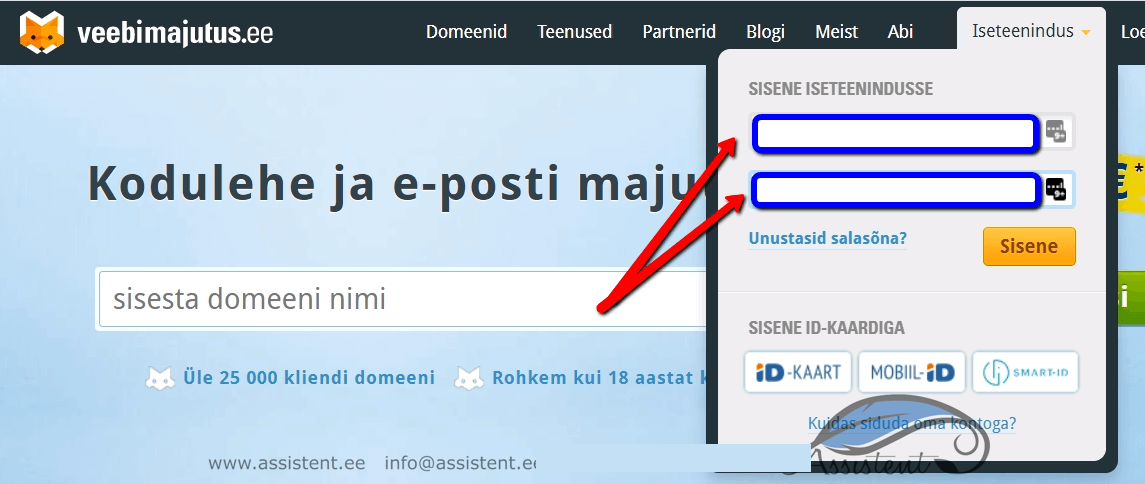
As an example we use the Veebimajutuse environment, so log in to the Veebimajutus self-service at veebimajutus.ee

Enter your username and password:
From the dropdown, choose the company you want to add a new email for and/or set up forwarding for:

Choose the domain you want to add a new email for and/or set up forwarding for:
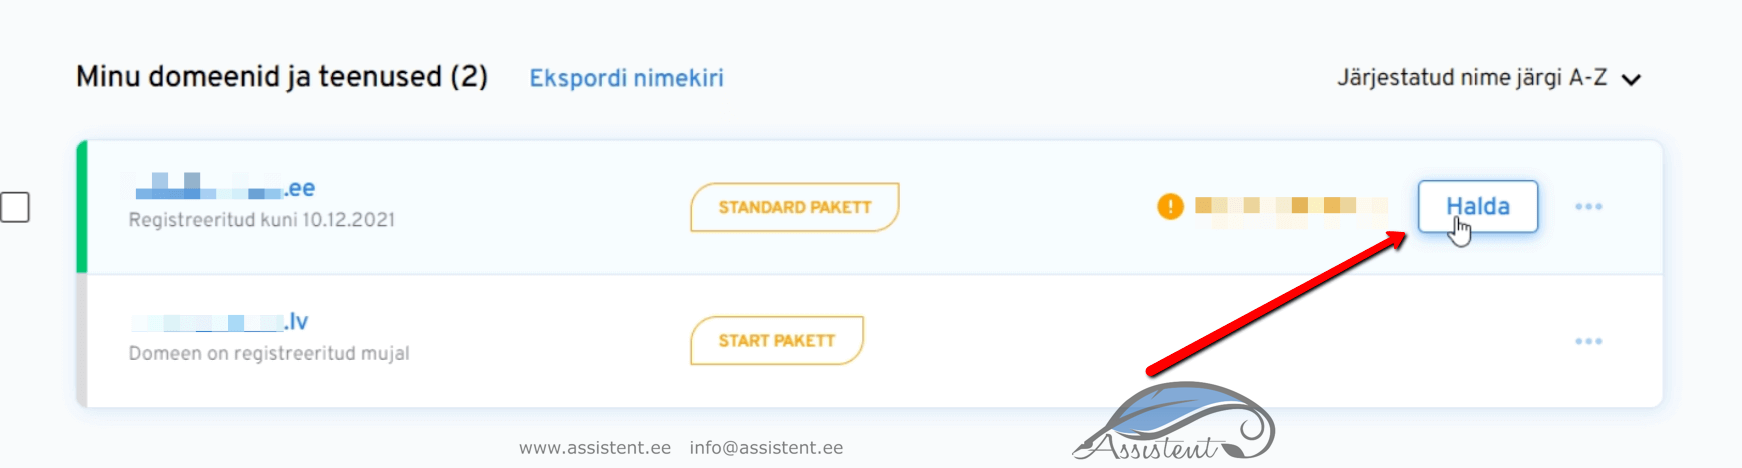
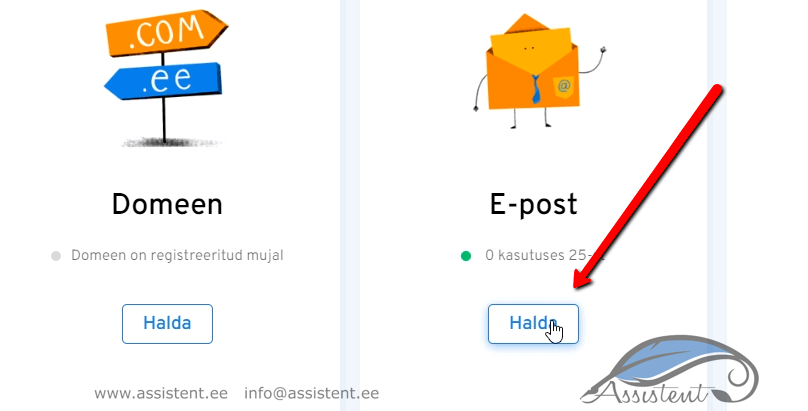
Choose email management:
Enter the name you want in front of the domain in the email address, and a password (you can also use the automatically generated one; it can be changed later):
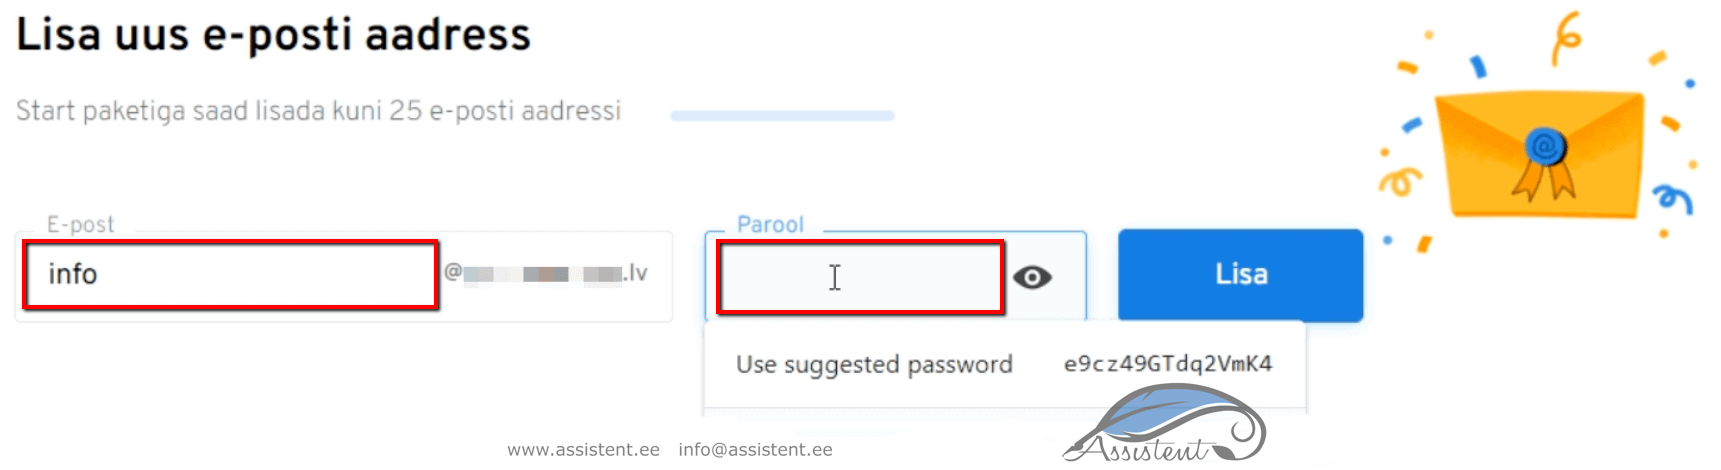
Click the “Lisa” (add) button:
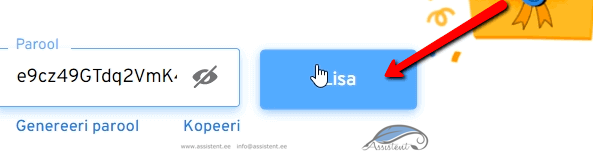
The new email address has now been added.
Adding the forwarding in Veebimajutus
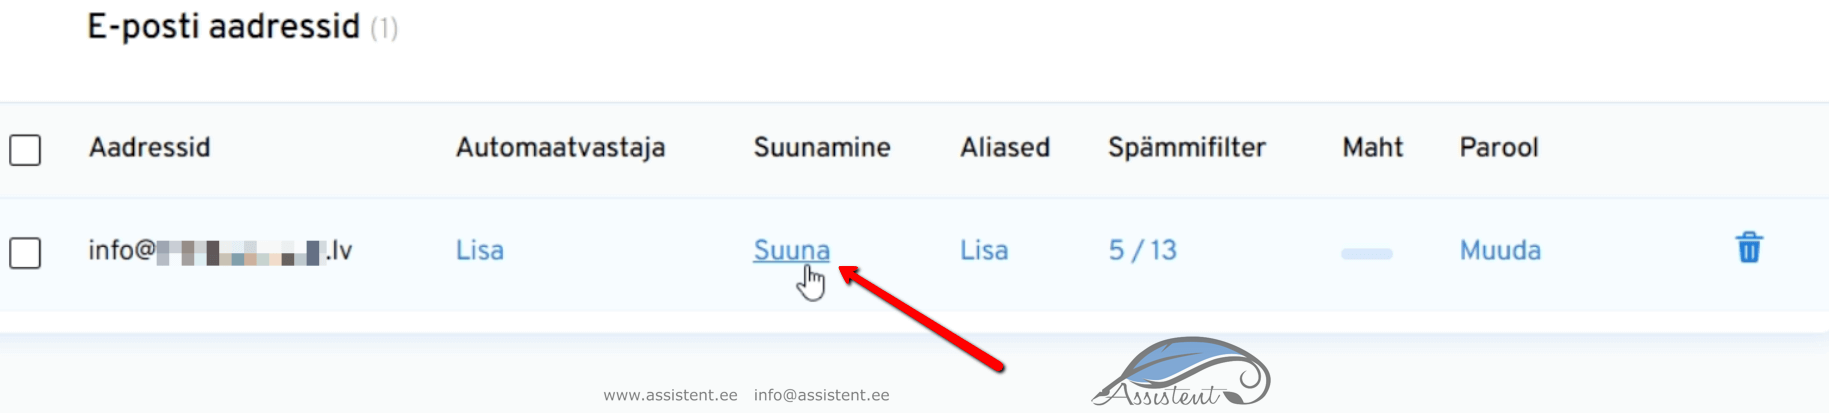
Scroll down a little and find the added email. Click “Suuna” (forward):
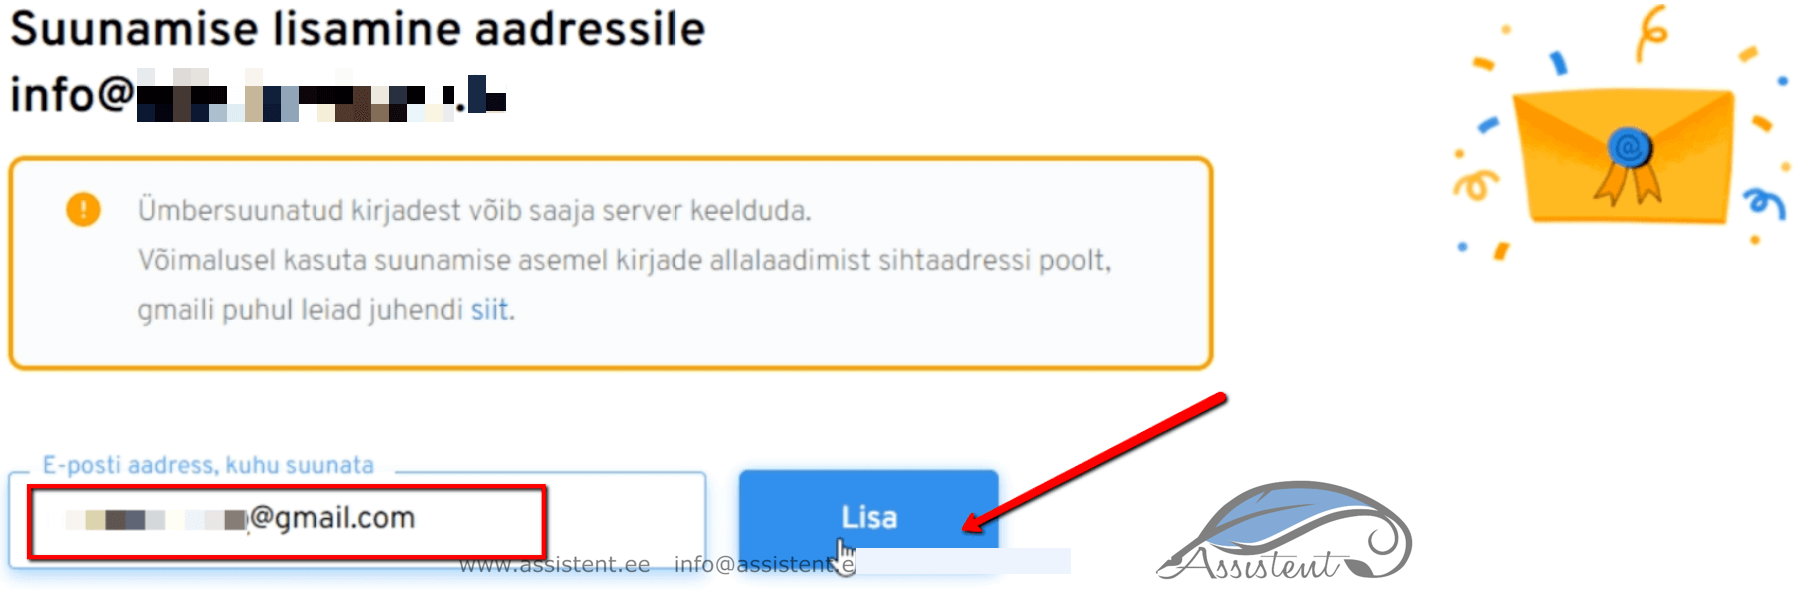
Enter the email address you want to forward to and click “Lisa” (add):
Forwarding is now set up. Scroll down a bit and choose whether a copy of the forwarded emails should also stay in the Veebimajutus inbox:
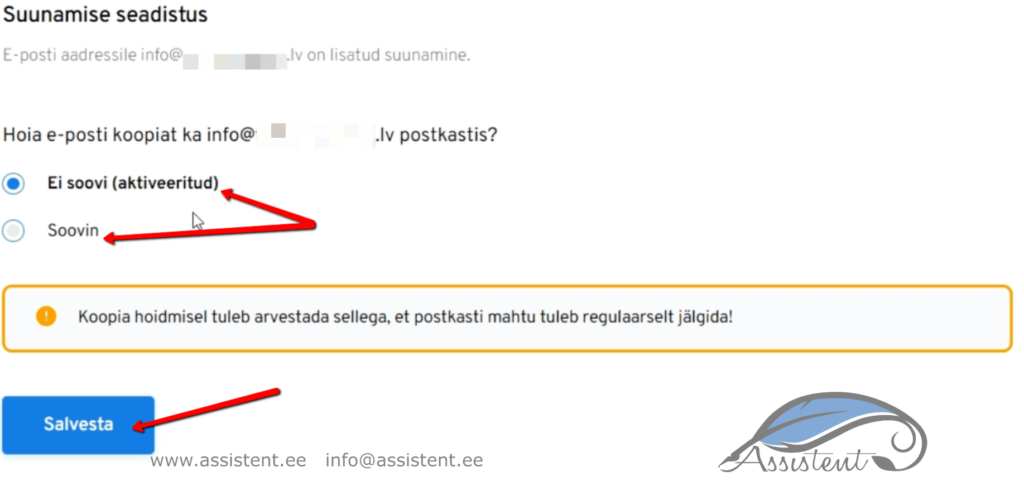
The emails are now forwarded automatically and, depending on your choice, will from now on be either only in your Gmail inbox or also in the Veebimajutus inbox.
Gmail and multiple reply addresses
When someone now writes to the @domain email, you see it in your Gmail inbox, but when you reply, the reply address is your Gmail address. It would be better if the reply went out from the same address the original email arrived at. So the reply address needs to be set up as well.
To do that, log in to your Gmail and open the settings:

In English-language Gmail, “Settings”:
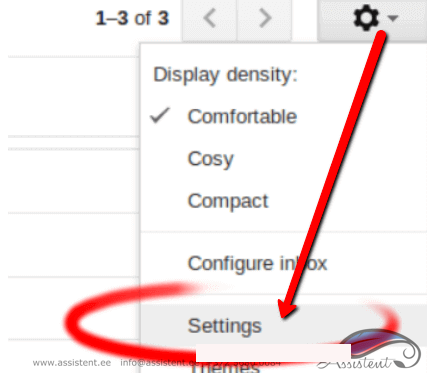
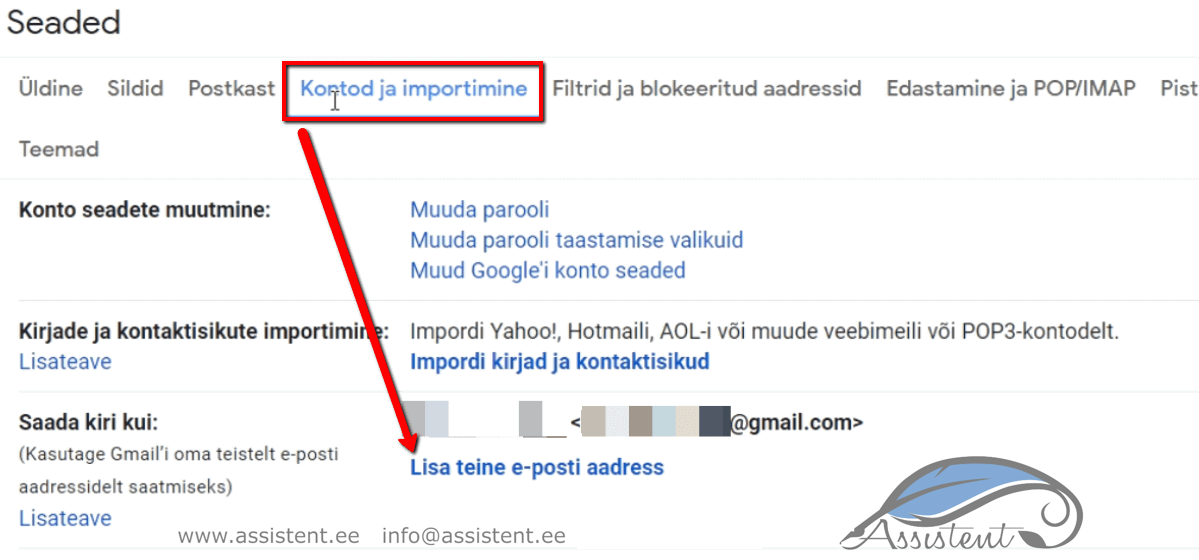
Then choose “Accounts and Import” and, under “Send mail as”, click “Add another email address”:
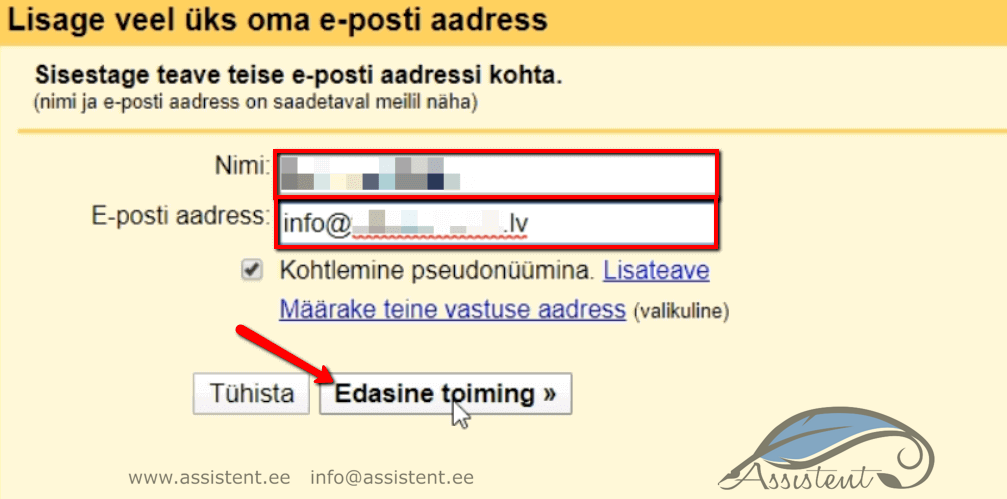
A new window opens; enter the name and the email address and click “Next Step”:
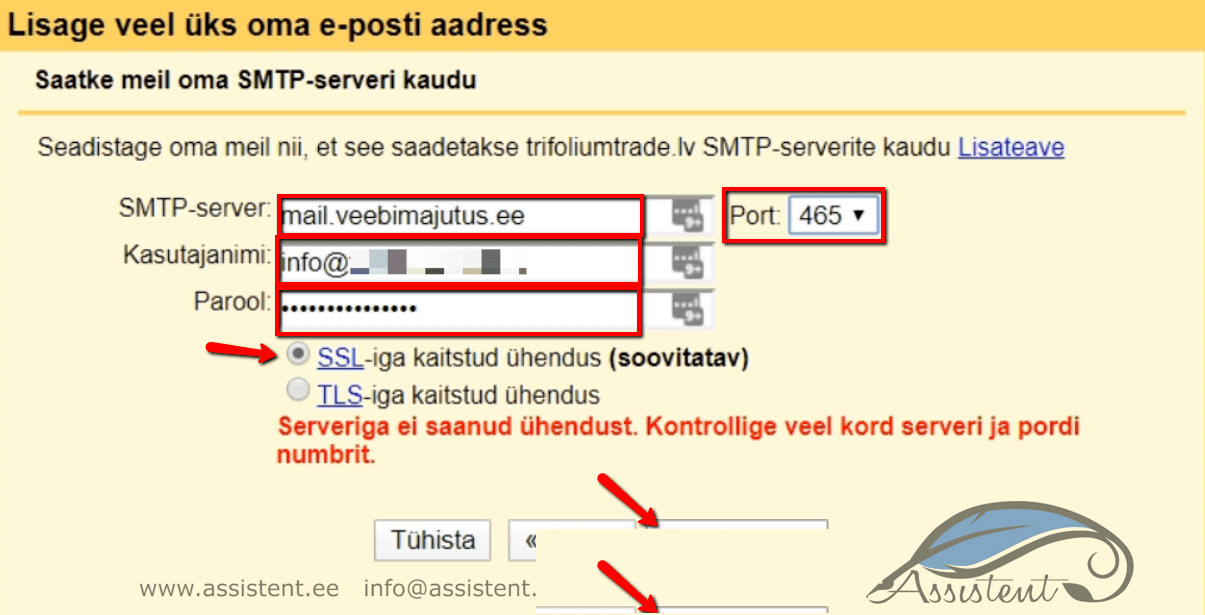
Then set the server tomail.veebimajutus.ee” and set the port number to 465.
As the username, enter your full email address and the email password.
Choose SSL as the connection security.
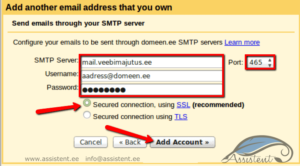
A window then opens telling you that a confirmation code has been sent to the inbox:
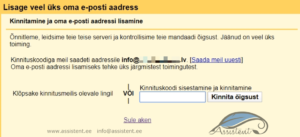
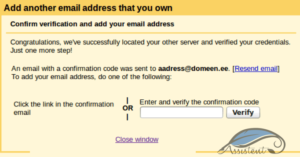
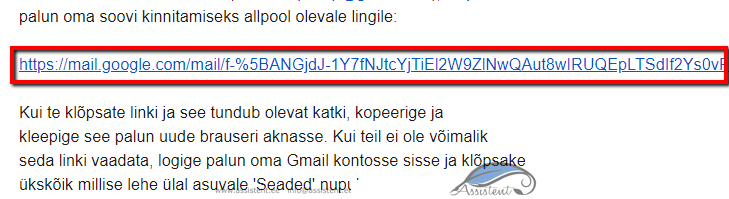
Go to your Gmail inbox, open the email and click the link it contains:
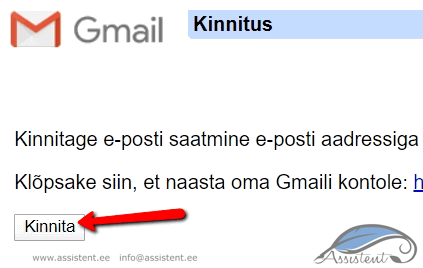
Then, in the window that opens, click “Confirm”:
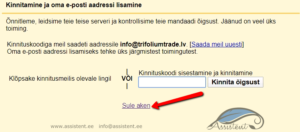
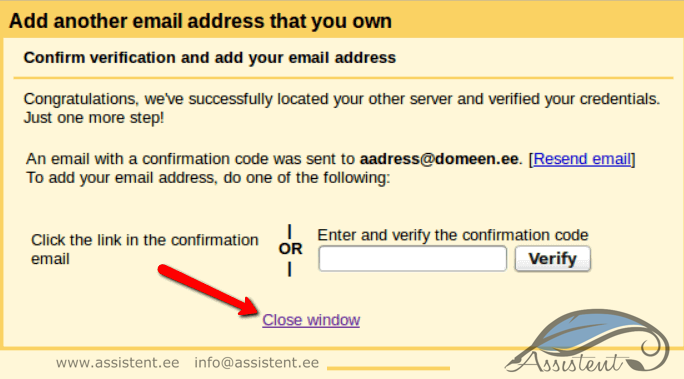
You can close the extra window that opened:
Now you can reply from the same address the email arrived at.
For this to happen automatically, one more move is needed.
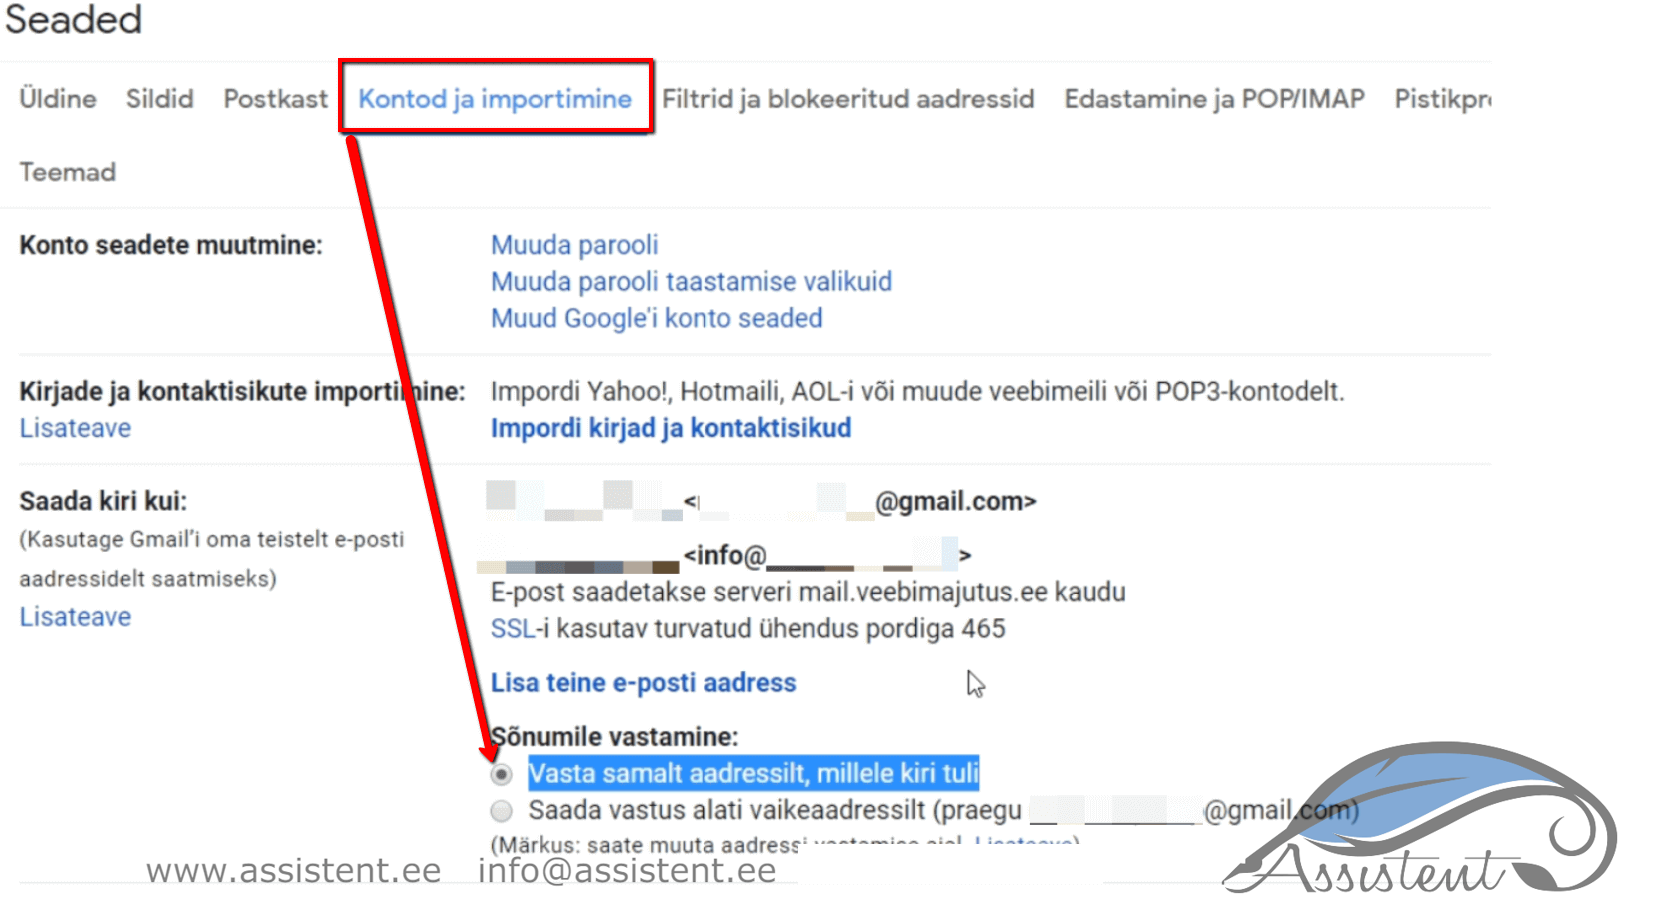
Open the Gmail settings once again and tick the option “Reply from the same address the message was sent to”:
After setting up the forwarding, check that everything works (send a test email) and make sure the senders and reply-to addresses are correct.
Setting up mail fetching inside Gmail
To set it up inside Gmail, log in to your Gmail and open the settings.
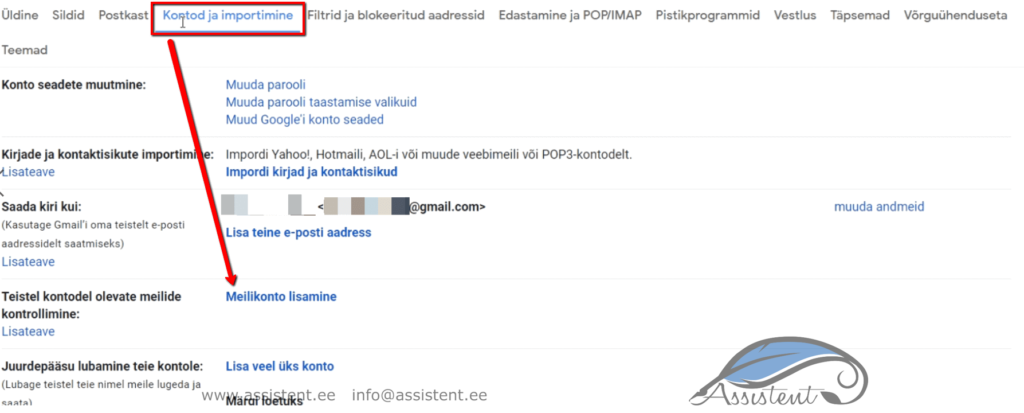
Next choose “Accounts and Import” and, under “Check email from other accounts”, click “Add an email account”:
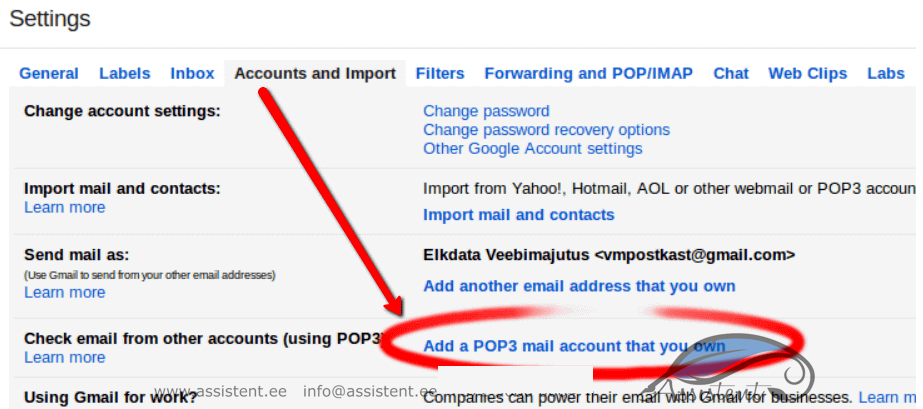
Or, if your Gmail is in English, under “Accounts and Import” valige “Check email from other accounts…”:
Then
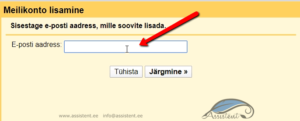
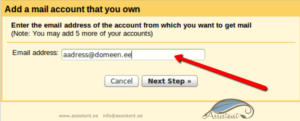
Then
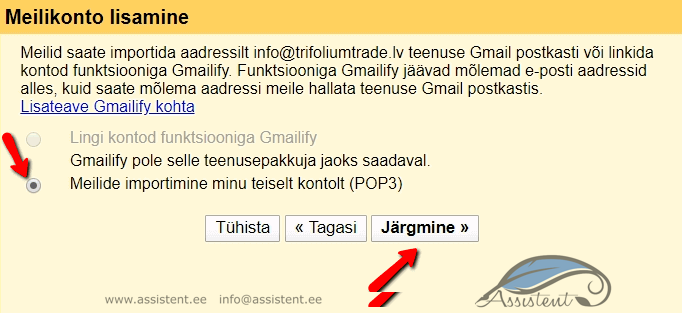
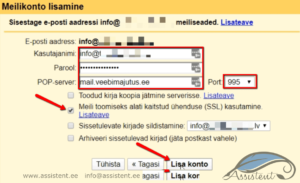
Enter the email username and password.
Set the POP server to mail.veebimajutus.ee and the port to 995.
Tick the box to use a secure connection (SSL).
If you want the fetched emails to also stay in the Veebimajutus inbox, tick “Leave a copy…” and then click “Add Account”:
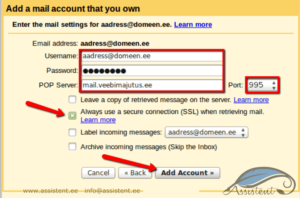
Everything is now set up.
After setting up the forwarding, do not forget to check that everything works (send a test email). Make sure the senders and reply-to addresses Gmailis are all correct.
What else is a Gmail account good for?
If you need an assistant to manage your emails for you, it is a good idea to create a separate Gmail account for them. You can forward different name@domain addresses to it. Here you can read about the different ways to let an assistant manage your email: take back 28% of your workday: simple steps for email management. Don’t miss the chance: focus your energy on the activities that matter most. Sorting spam or answering the same questions over and over is certainly not one of them!
Changing the sender name shown in Gmail
Sometimes the name your recipients see before opening the email is not quite what you would like to show. It may initially be your own name, but once you hand inbox management to an assistant, that is no longer correct. What to do?
If you have created an info@domain, services@domain or similar email but Gmail shows your personal name (while it should show the company’s or the assistant’s name), it is easy to change. Do the following:
At first Gmail shows the name like this:
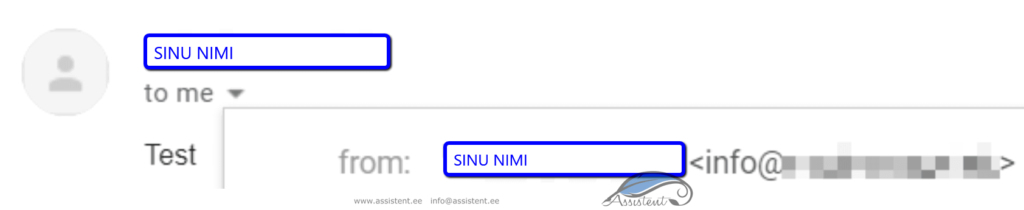
To change it, open the Gmail settings:
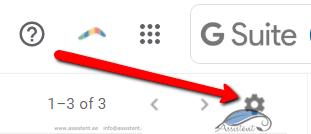
Then
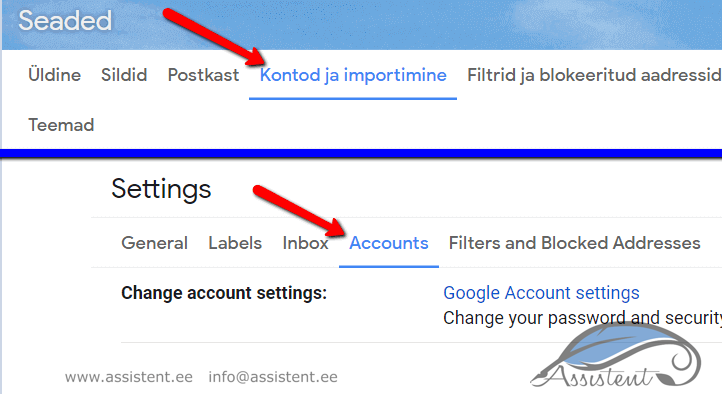
There you will findSend mail as:“Send mail as:”
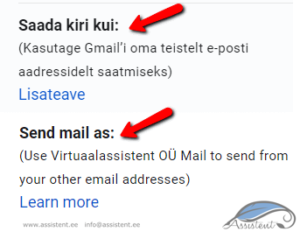
Then
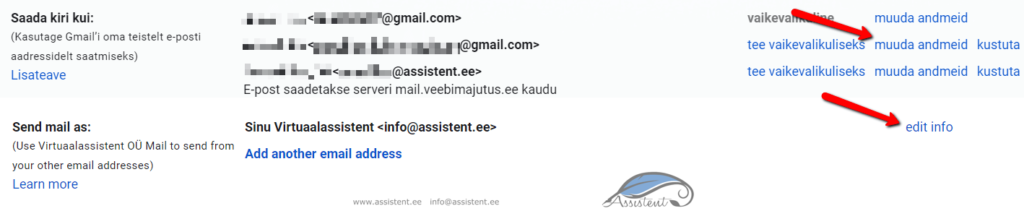
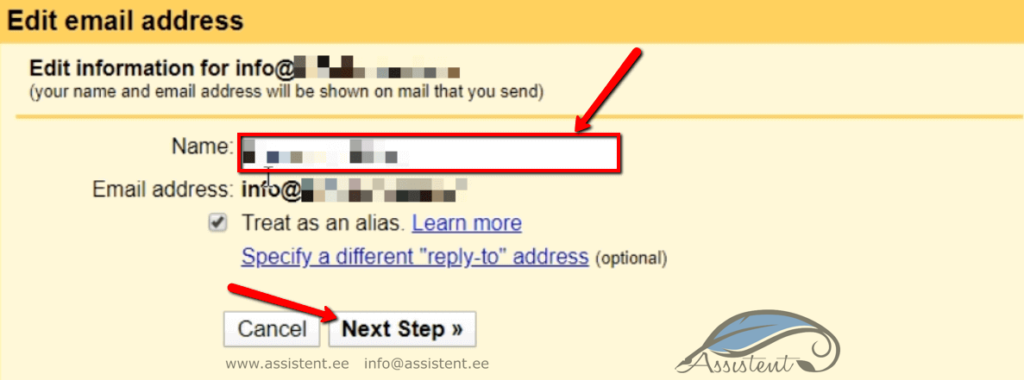
A new window opens where you change the name and then click “Next Step”:
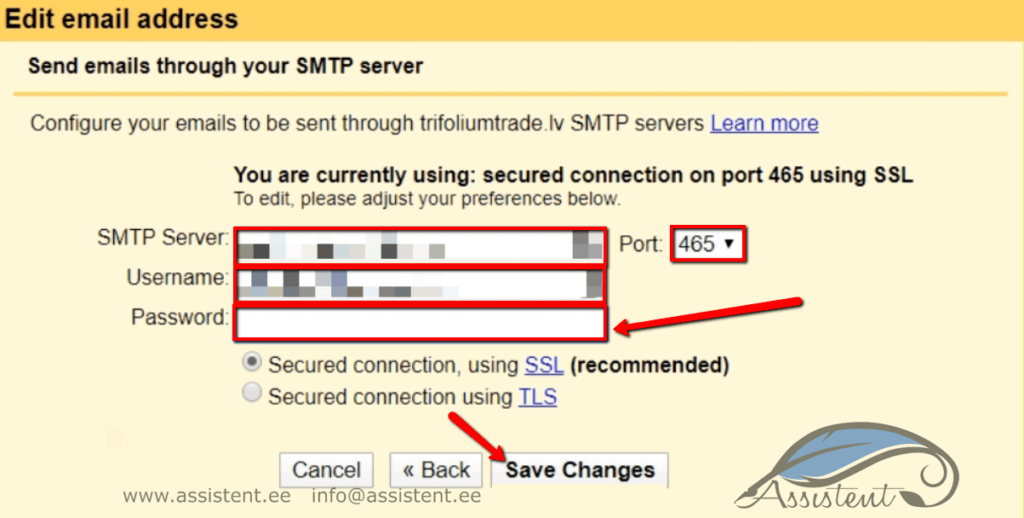
Gmail then asks for the password of the specific mailbox whose name you are changing (all other fields should be filled automatically; if not, fill them in too). Enter the password and click “Save Changes”:
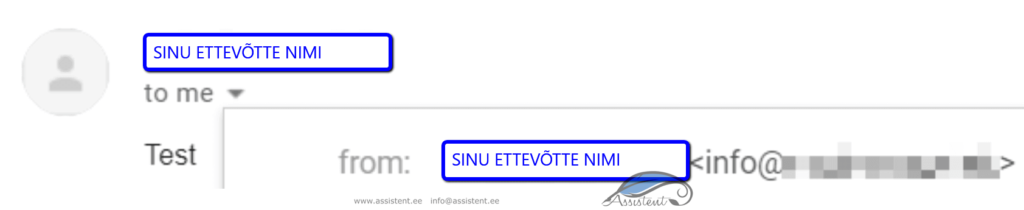
And that is it! Test that everything works: send an email from that address in Gmail to one of your other addresses. You should see something like this:
If this guide was useful to you, click “Like”, and if it could interest your friends as well, click “Share”.